Cloud Computing is the delivery of on-demand computing services — from applications to storage and processing power — typically over the internet and on a pay-as-you-go basis. In the Cloud Computing Series posts, we will walk through the following topics:
* Setup a Compute Engine on GCP* Setup a proper environment for AI development* Deploy AI applications on the Cloud
In this post, we will talk through how to create a Compute Instance with vGPU in Google Cloud Platform.
Intro to GCP
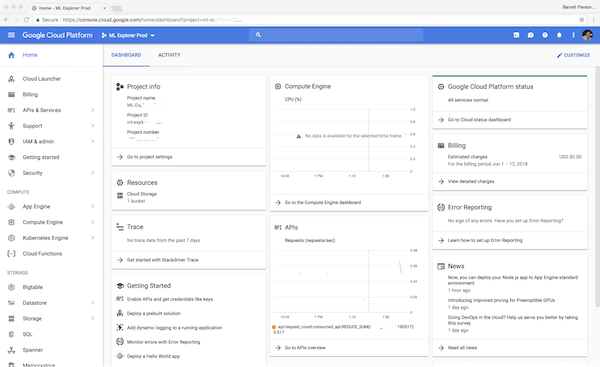
Google Cloud Platform (GCP) is a portfolio of cloud computing services that grew around the initial Google App Engine framework for hosting web applications from Google’s data centers.
Google Cloud computing services cover a vast range of options now, from the basics of storage, networking, and processing power through to natural language processing and artificial intelligence as well as standard office applications. Pretty much any service that doesn’t require you to be physically close to the computer hardware that you are using can now be delivered via the cloud.
Google Cloud Platform products tailored for Artificial intelligence & Machine Learning include but not limited to: AI Hub (beta), Cloud AutoML (beta), Cloud TPU, Cloud Machine Learning Engine, Diagflow Enterprise Edition, Cloud Natural Language, Cloud Speech-to-Text, Cloud Text-to-Speech, Cloud Translation, Cloud Vision, Cloud Video Intelligence, Cloud Inference API (alpha), and more.
Create a Compute Engine with GPUs
Registration
- Create a Google Account or use your personal one.
- Create a Google Cloud account.
- During the setup process, you need to provide a valid Credit Card credential.
The free trial is valid for 12 months, and an initial credit of USD300.
For the purpose of my proof-of-concept, it should be more than enough.
Setting Up GPUs
By default, any new user is set to have 0 Quotas for GPU Computing. To increase the Quotas for GPUs, you must manually request for increasing the GPU Quota.
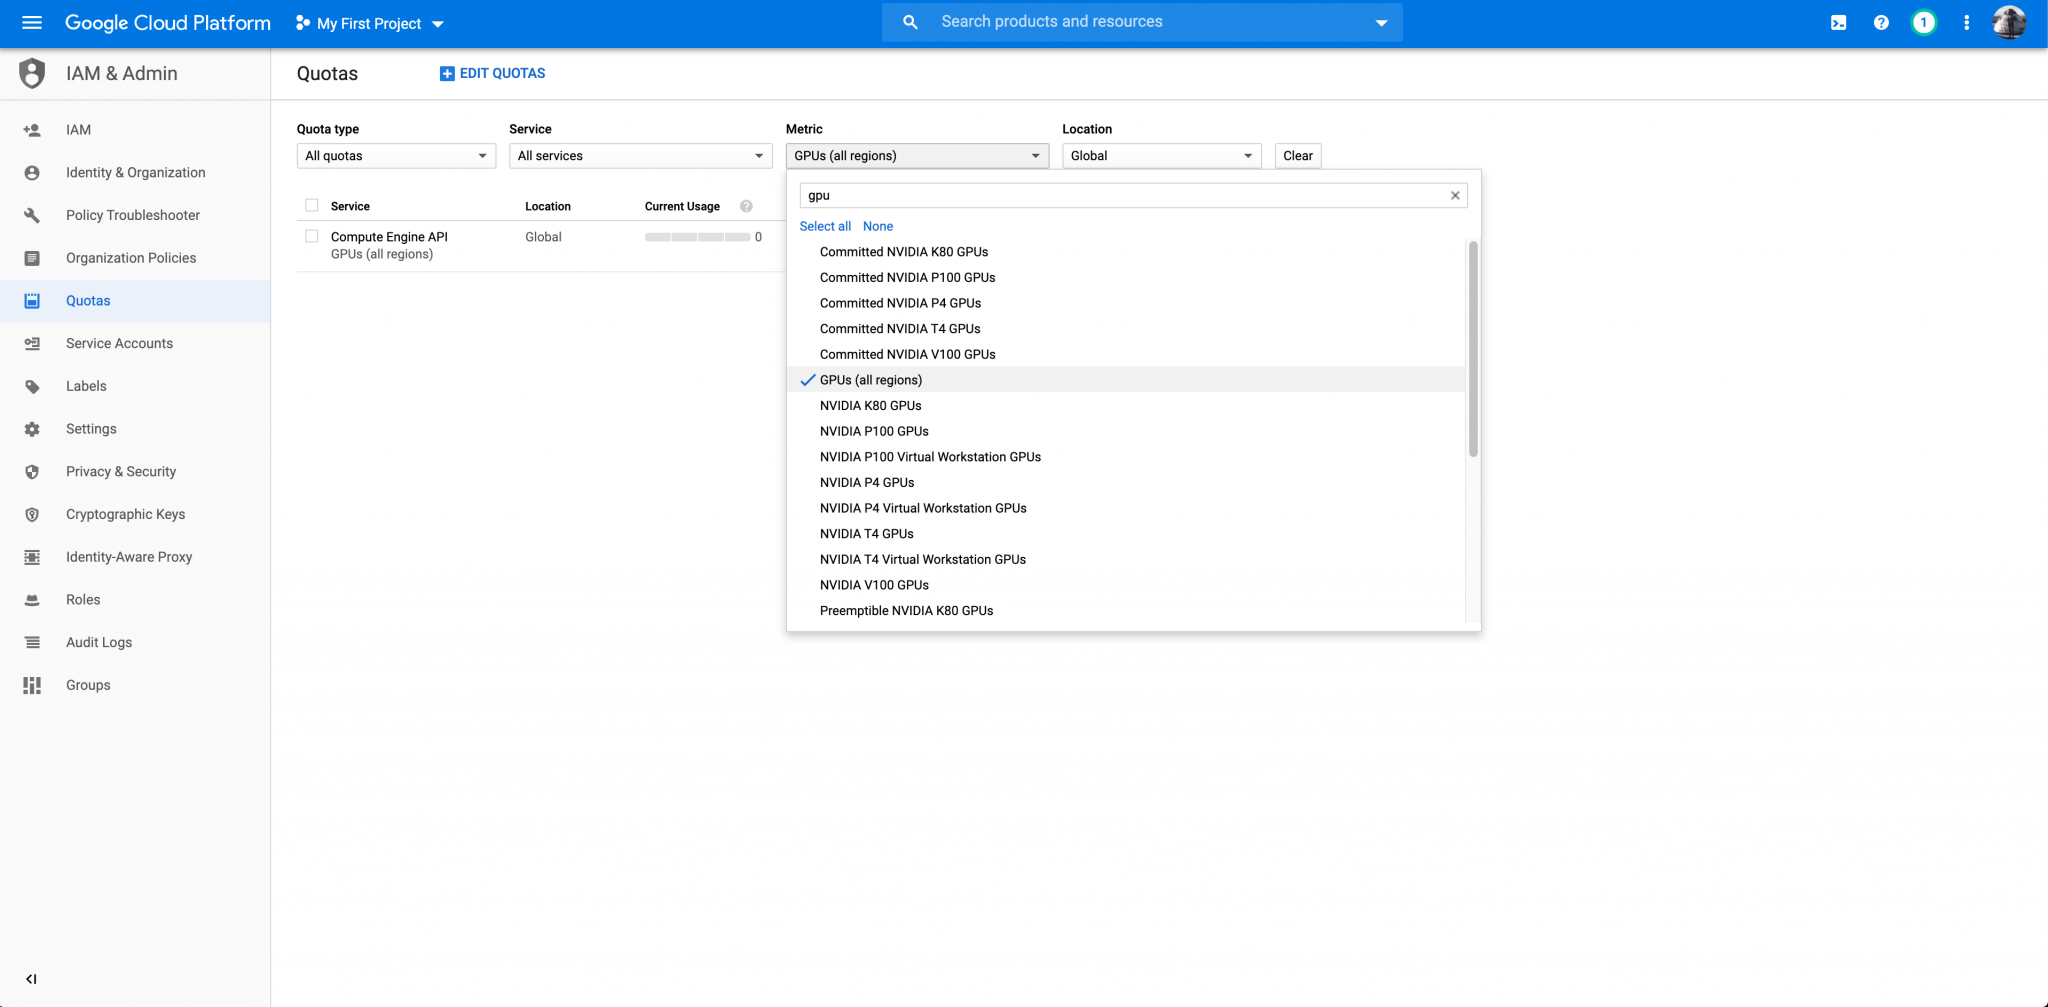
Login in to GCP console, then go to IAM & Admin » Quotas, or simply type QUOTAS in the seach tab.
Find the Metric Tab, click None first and then select GPUs (all region); find the Location tab next to the Metric Tab, click None first and then select Global as shown below:
Select the clicked box next to Compute Engine API, and then click the EDIT QUOTAS tab above as shown below:
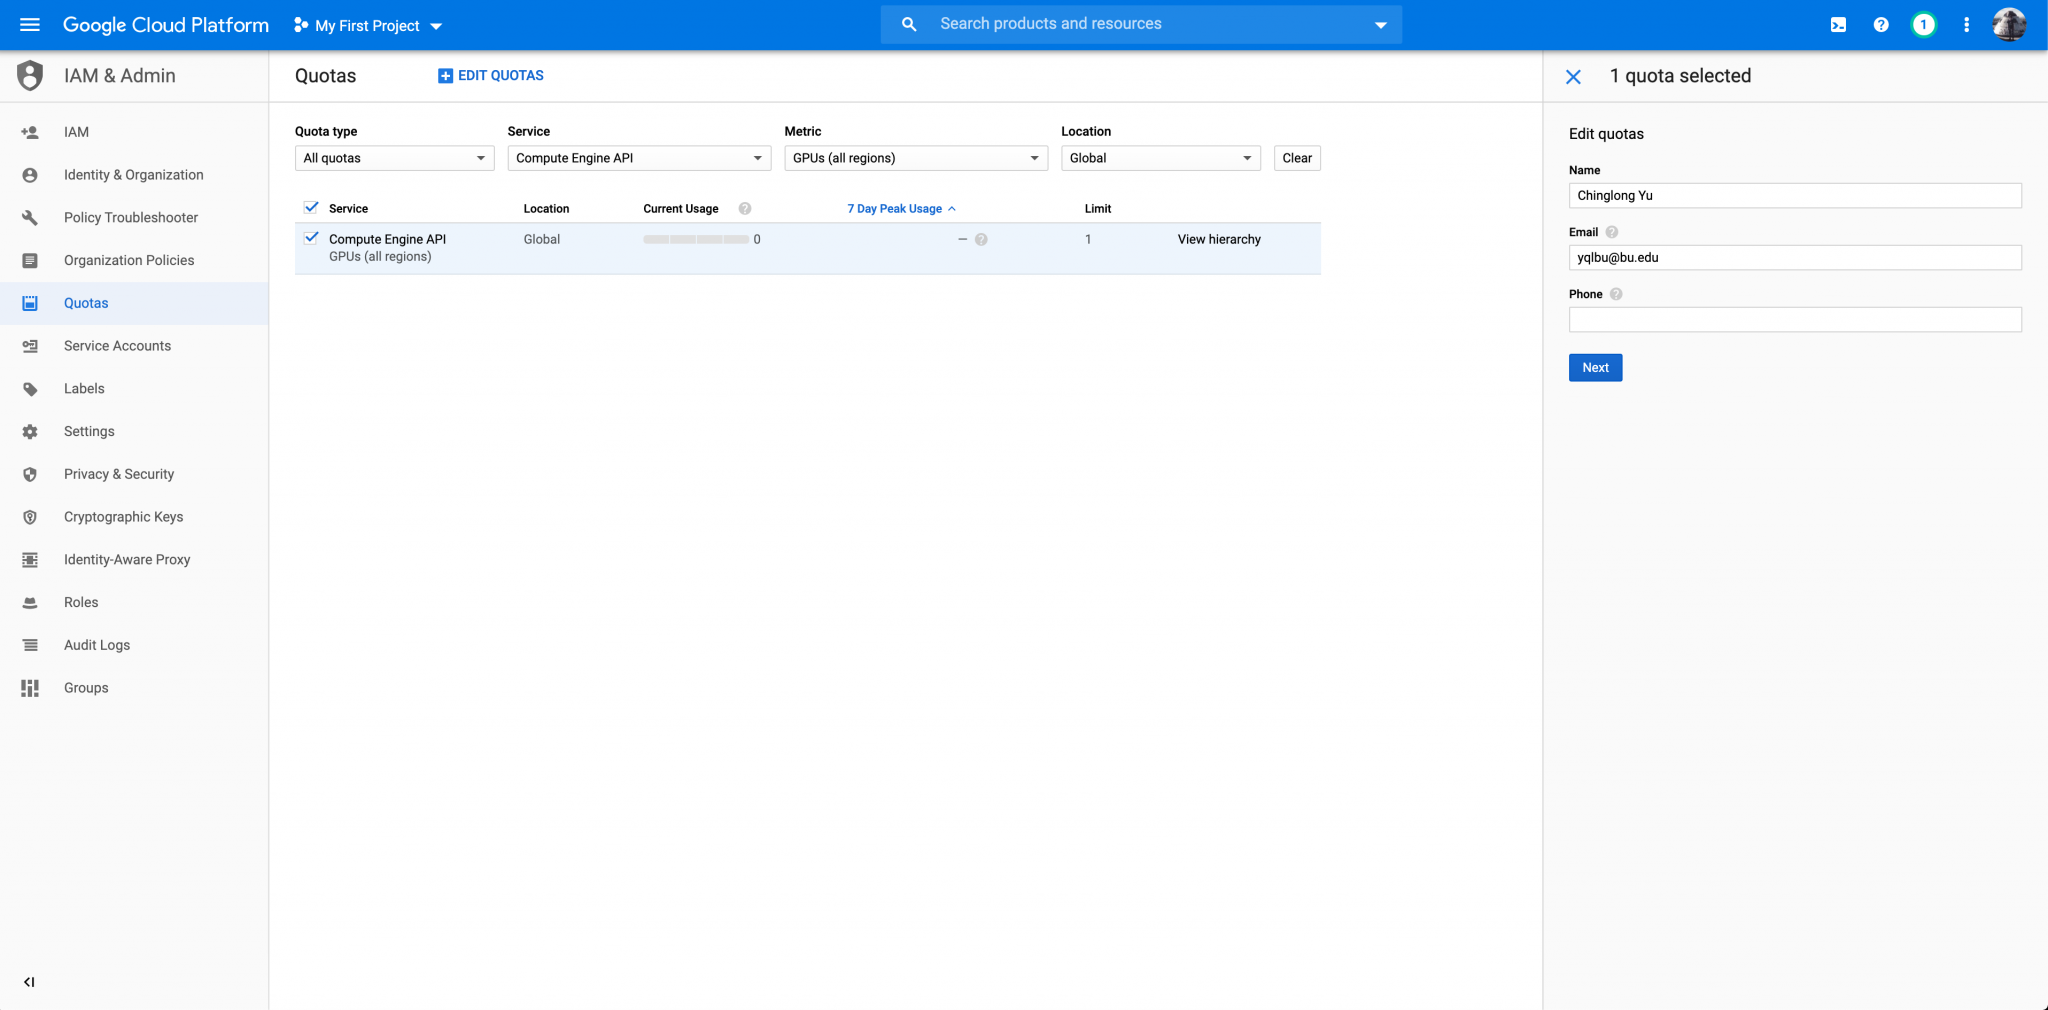
Finally change the quotas from 0 to 1, and fill in the Request description as shown below:
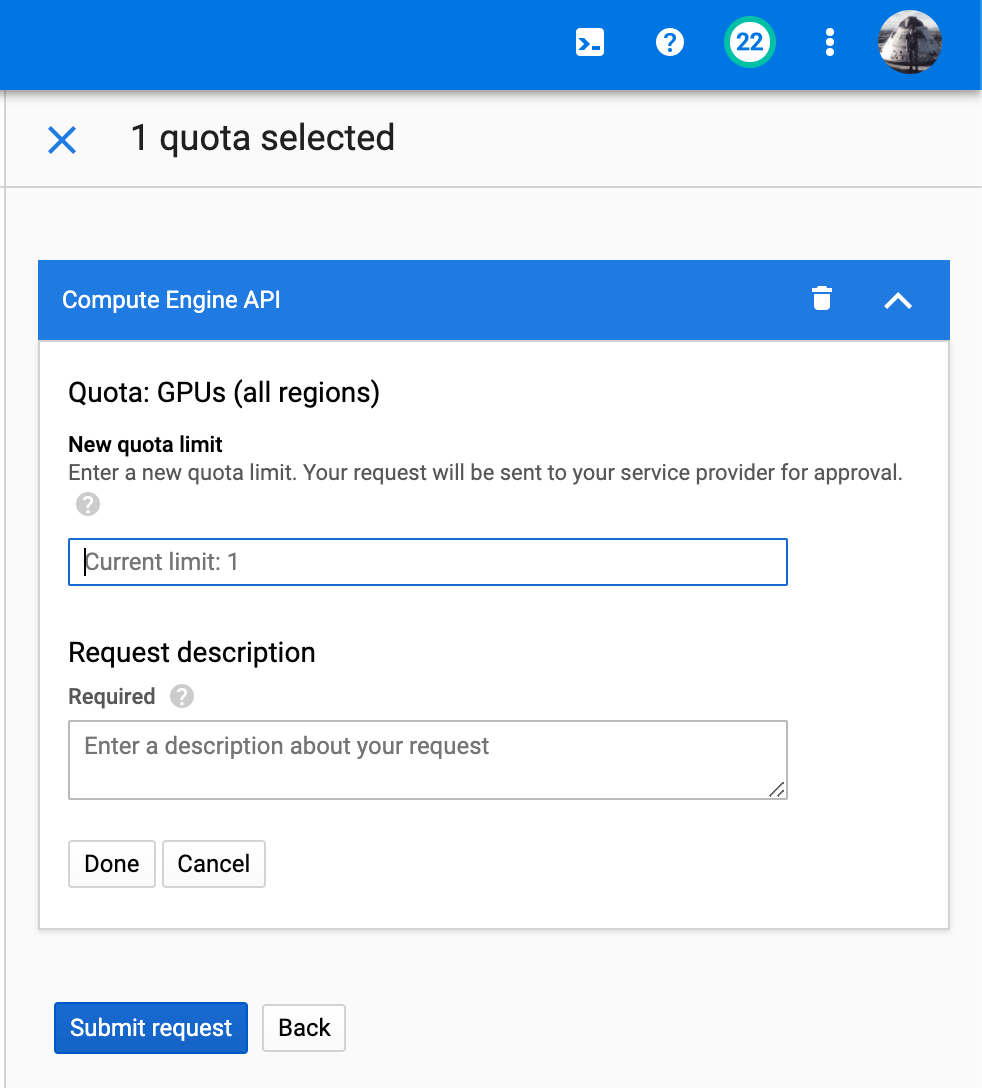

You will receive a confirming email from GCP referring to your Quotas Request. If you have received an email similar to what as shown below, you should be good to go. The feedbacks normally comes in less than 24 hours.
Once the step above is completed, you may move on and start creating a new Compute Instance.
Create a Compute Instance
Navigate to your GCP Console, on the left Panel, find the section named Compute Engine, and click it. The section panel is shown as below:
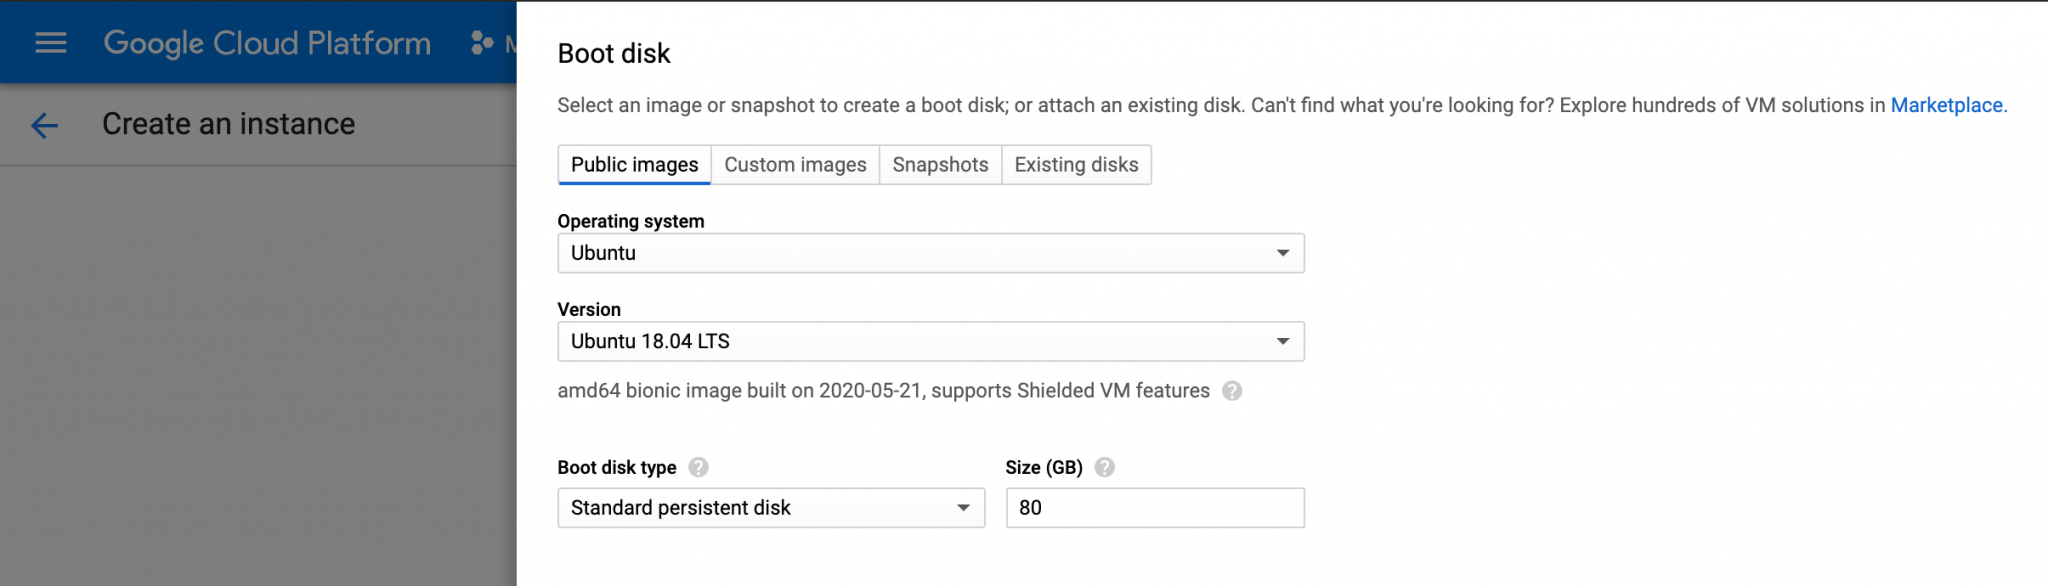
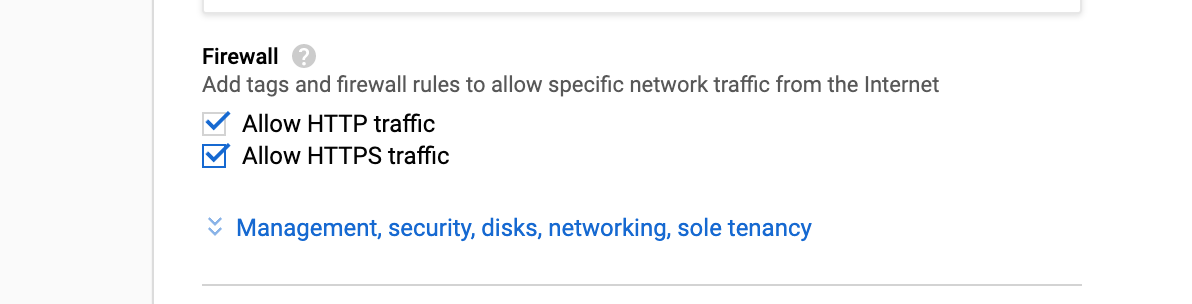
You will need to do the folowing configuration for the instance:
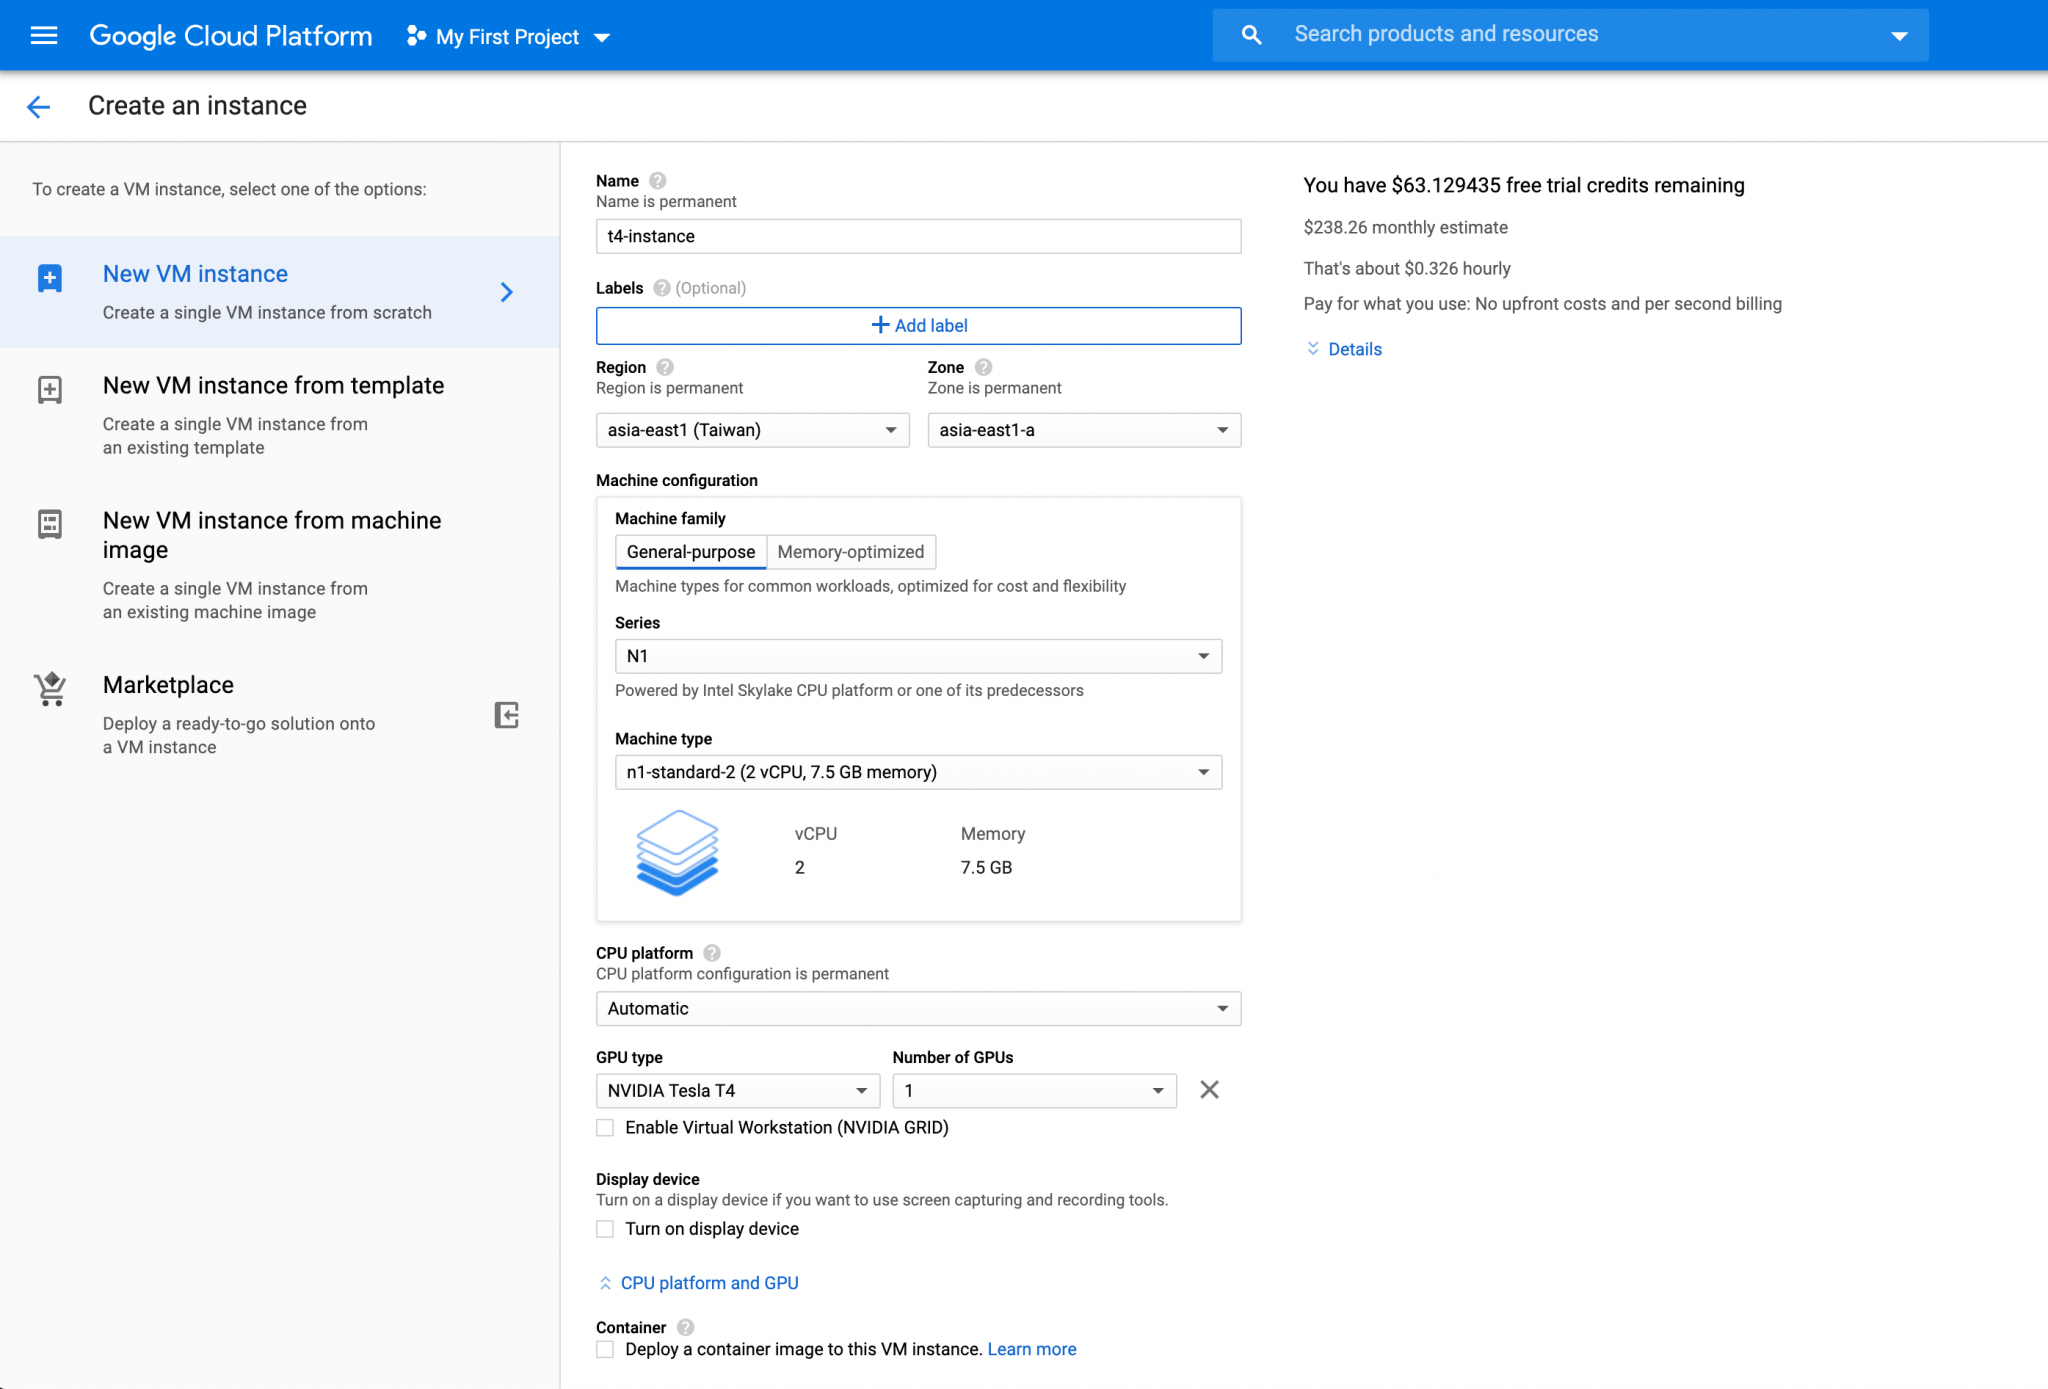
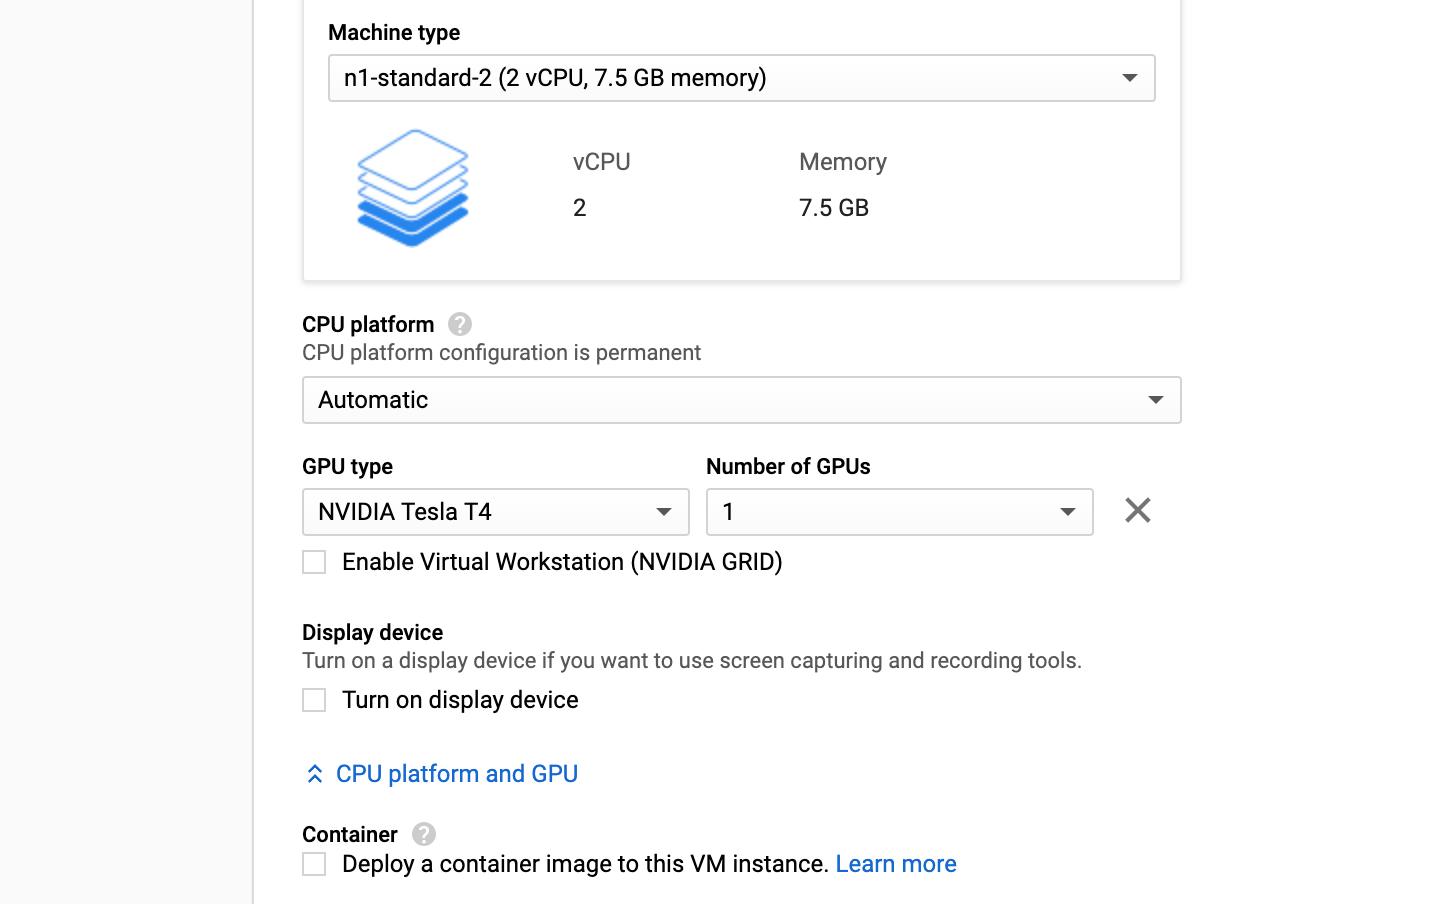
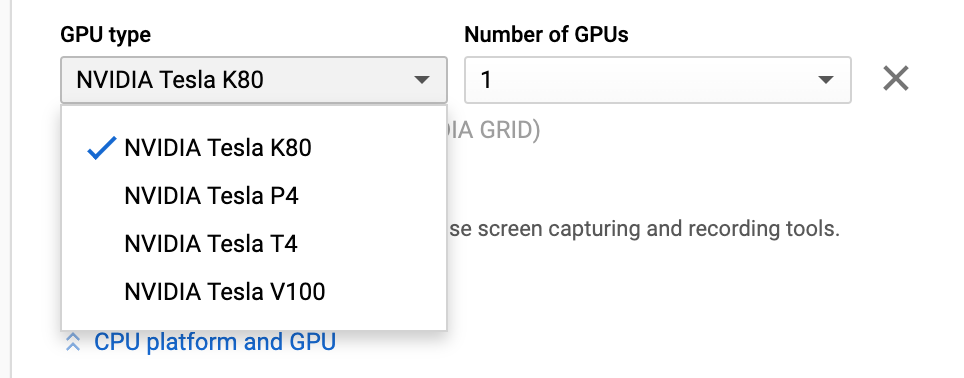
* Click CREATE INSTANCE on the top section tab* Give a name to the instance* In the Region section, choose a region that is close to you* In the Machine Type section, since we are using this instance to do some AI heavy-lifting job such as training a Neural Network, we might need to increase RAM from 3.75GB + 1Core (n1-stantand-1) to 7.5GB +2Cores (n1-standard-2)* In the CPU platform and GPU (below Machine type section), click Add GPU, choose your desired GPU type* In the Boot Disk section, choose Ubuntu 18.04, and set the storage size to whatever size you want (recommend 60GB + size)* In the Firewall section, select Allow HTTP and HTTPS traffic* Finally, click Create
Congratualations! You have successfully created a Cloud Computing VM Instance with Nvidia GPU support!
Setup Environment for AI Development
Remote Login
There are multiple ways to log in to GCP VM instance, the simplest way is to set a password for the current user, and log in with a password via SSH. You may also log in with KEY as well. The example below demonstrates how to log in to the instance with a password via SSH.
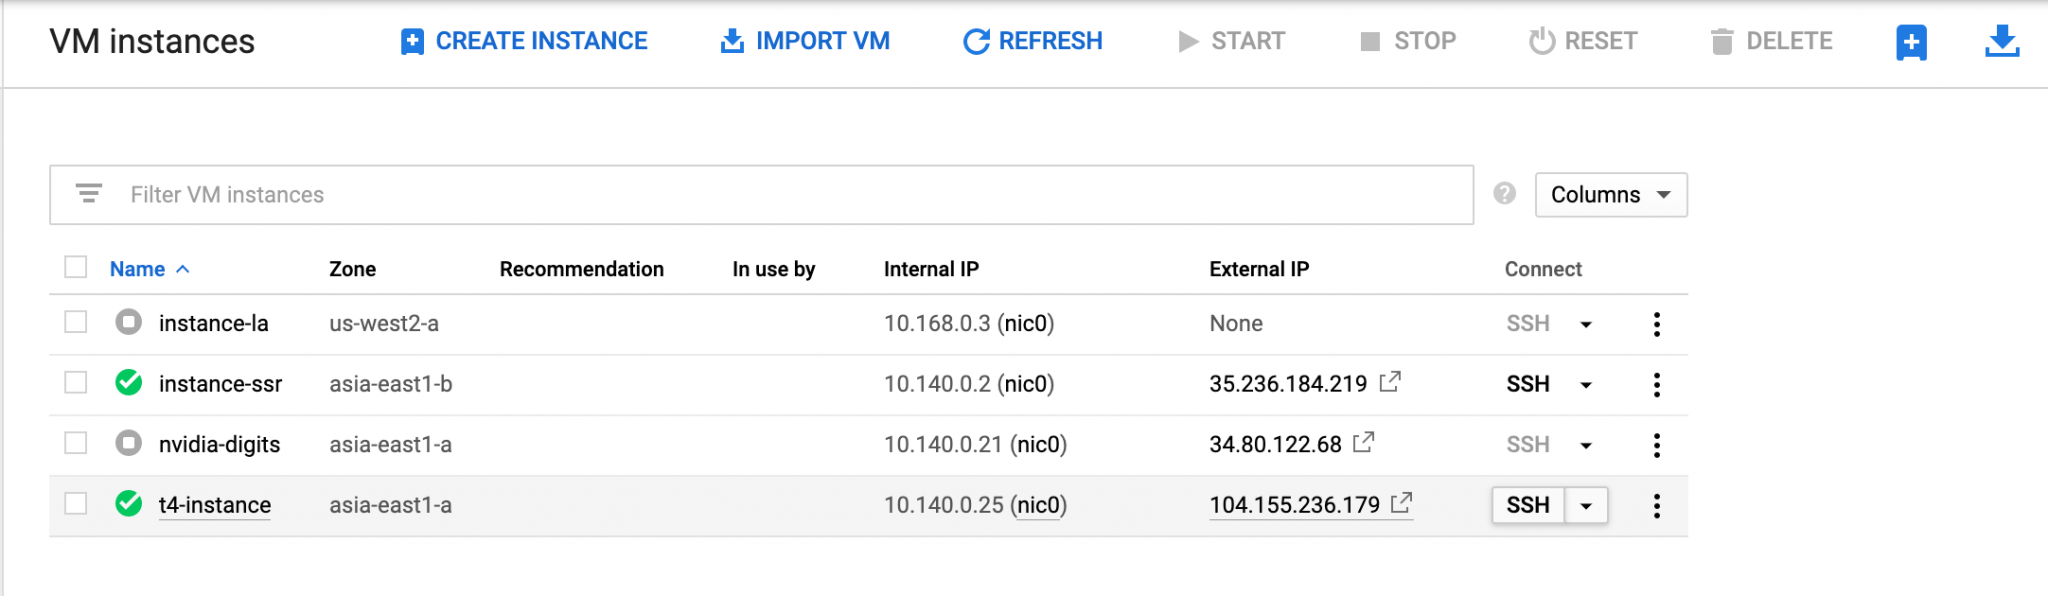
In the Compute Engine Console, select the instance you created, under the Connect Tab, click the SSH button
Type in the following commands:
1$ sudo -i
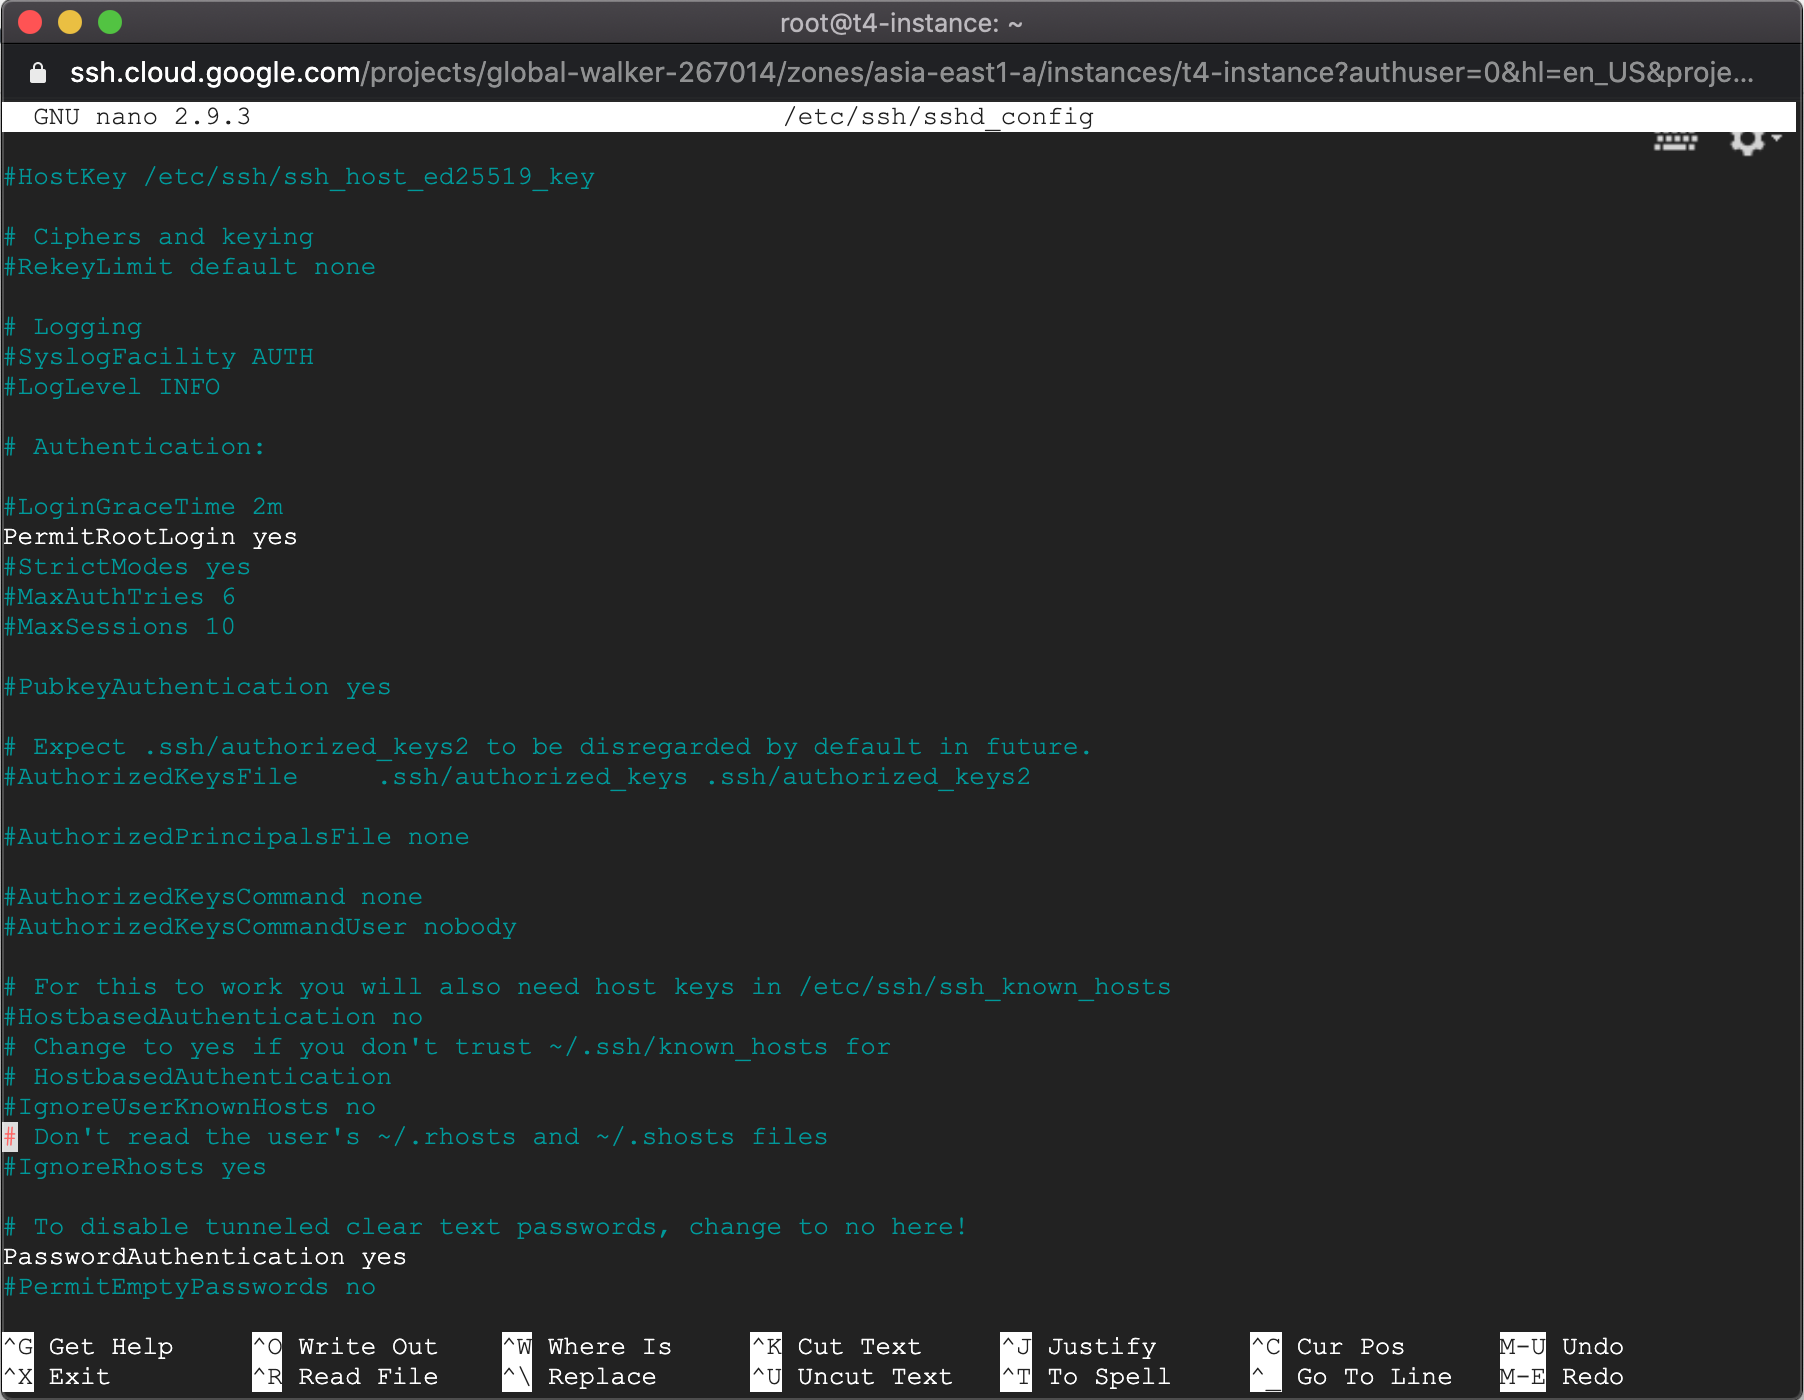
2$ nano /etc/ssh/sshd_config
3# find the following line use Ctrl + W, and change as set below
4# PasswordAuthentication yes
5# PermitRootLogin yes
1$ passwd root
2$ service sshd restart
Now, you should be able to log in as root with a set password. On your local machine, open up a new terminal, type the following command:
Install CUDA and cuDNN
You will need to install CUDA and cuDNN support for the vGPU. I have written scripts to speed up the installation process. Follow the instructions below, and you should be good to go.
1$ cd ~
2$ git clone https://github.com/miooochi/CloudComputing
3$ cd CloudComputing
4$ sudo chmod +x cuda_10.2_install.sh
5$ sudo chmod +x cudnn_7.6.5_install.sh
6$ sh cuda_10.2_install.sh
7$ sh cudnn_7.6.5_install.sh
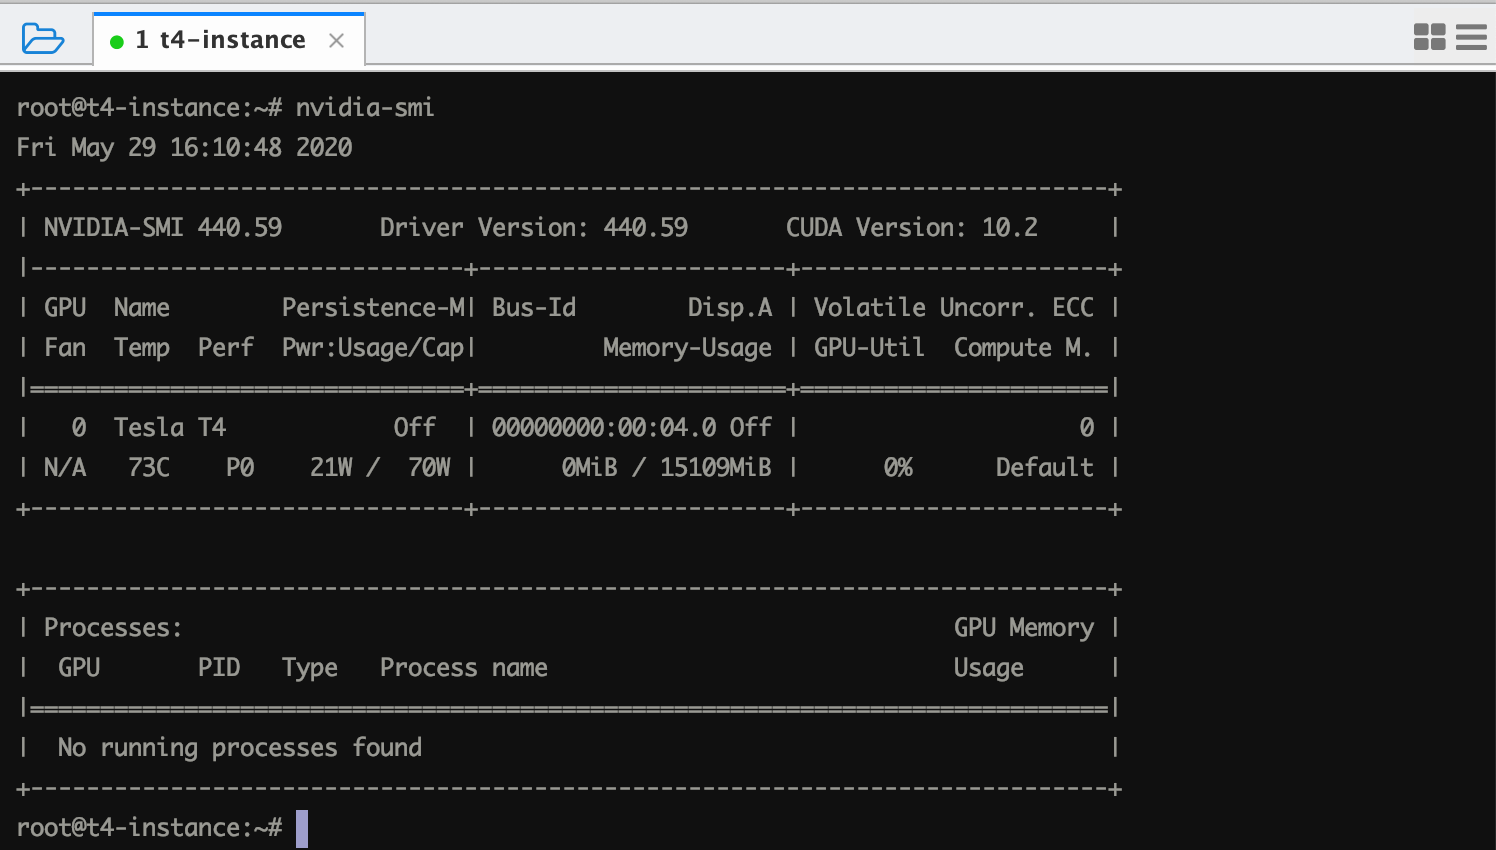
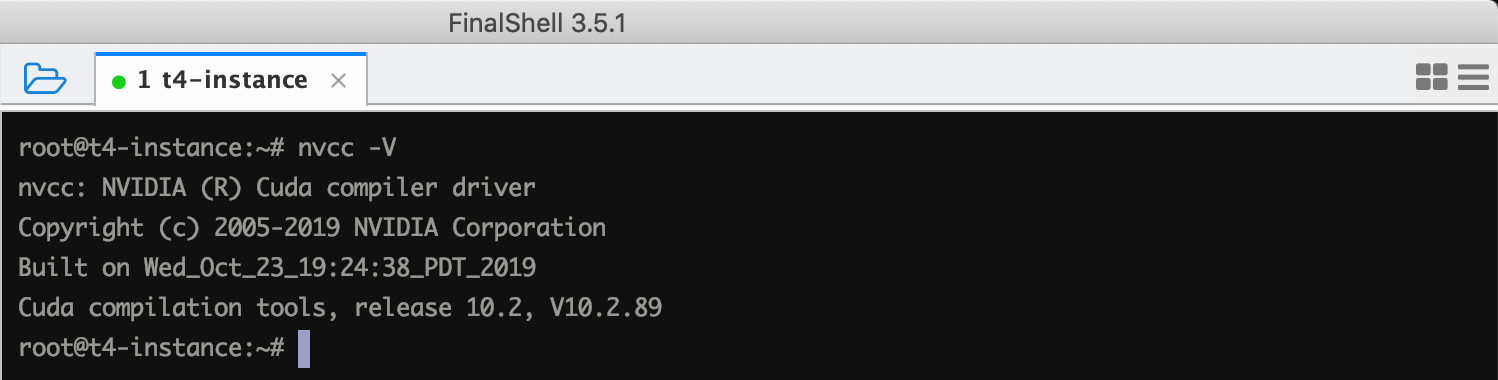
If everything sets up properly, you should be able to see the driver and CUDA toolkit installed in your VM as shown below.
Shut Down Instance
Compute Engine charges for usage based on the following price sheet. A bill is sent out at the end of each billing cycle, listing previous usage and charges. Prices on this page are listed in U.S. dollars (USD). All vCPUs, GPUs, and GB of memory are charged a minimum of 1 minute. For example, if you run your virtual machine for 30 seconds, you will be billed for 1 minute of usage. You may check out more information HERE
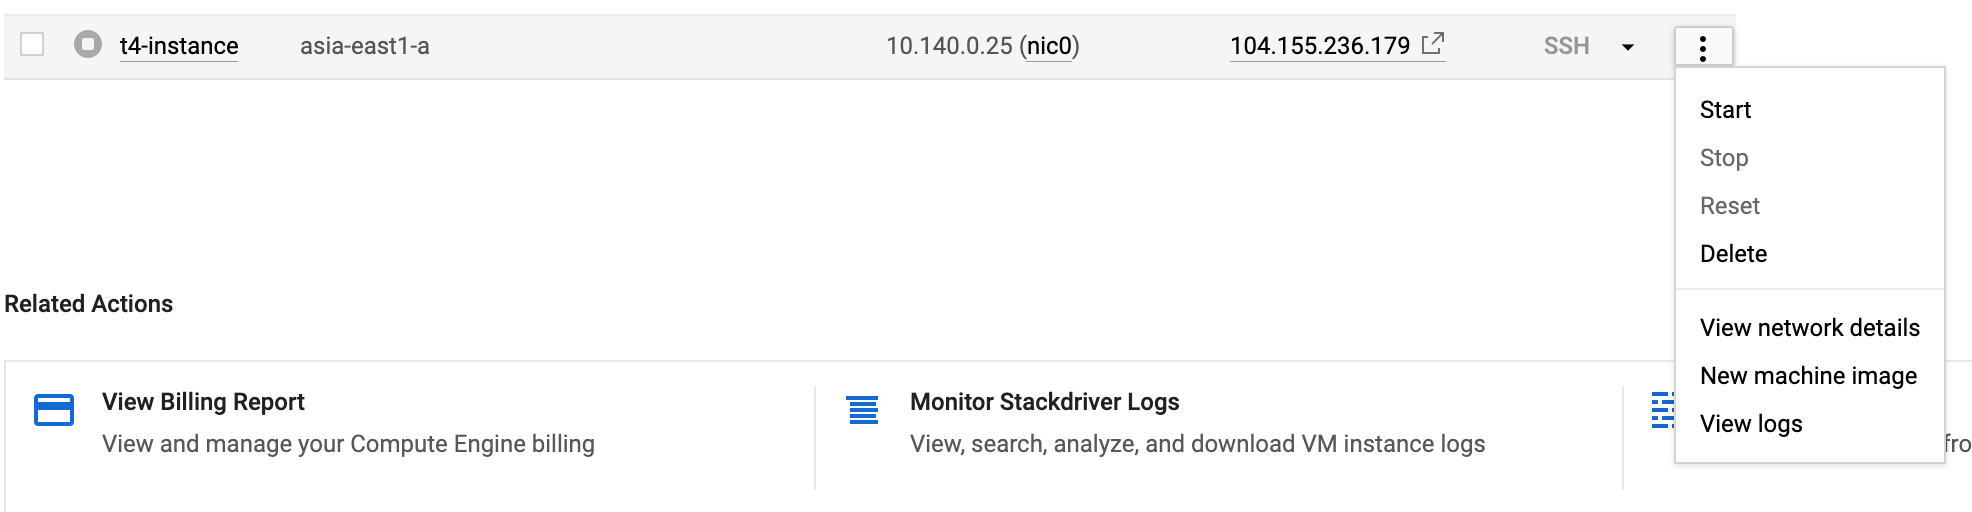
If you have your VM instance run 24 hours continuously, the bill will increment accordingly. Therefore, I recommend you shut down the instance at any time when you finish your AI heavy-lifting work. The shutdown process is pretty straight forward, you may do the operation in the Compute Engine Console as shown below:
Click Stop
What’s Next
In the next post, we will install the necessary software (Jupyter, Pytorch, Tensorflow, OpenCV, etc) and dependencies as an environment for AI development. Stay tuned to my next post!

 Kevin Yu