Archiconda3 is a distribution of conda for 64 bit ARM. Anaconda is a free and open-source distribution of the Python and R programming languages for scientific computing (data science, machine learning applications, large-scale data processing, predictive analytics, etc.), that aims to simplify package management and deployment. Like Virtualenv, Anaconda also uses the concept of creating environments so as to isolate different libraries and versions. Check out my repo for the installation guide.
Why using Archiconda 3 is a Plus for Edge Devices?
Conda is a cross platform package and environment manager that installs and manages conda packages from the Anaconda repository as well as from the Anaconda Cloud. Conda packages are binaries. There is never a need to have compilers available to install them. Additionally conda packages are not limited to Python software. They may also contain C or C++ libraries, R packages or any other software.
This highlights a key difference between conda and pip. Pip installs Python packages whereas conda installs packages that may contain software written in any language. For example, before using pip, a Python interpreter must be installed via a system package manager or by downloading and running an installer. Conda, on the other hand, can install Python packages as well as the Python interpreter directly.
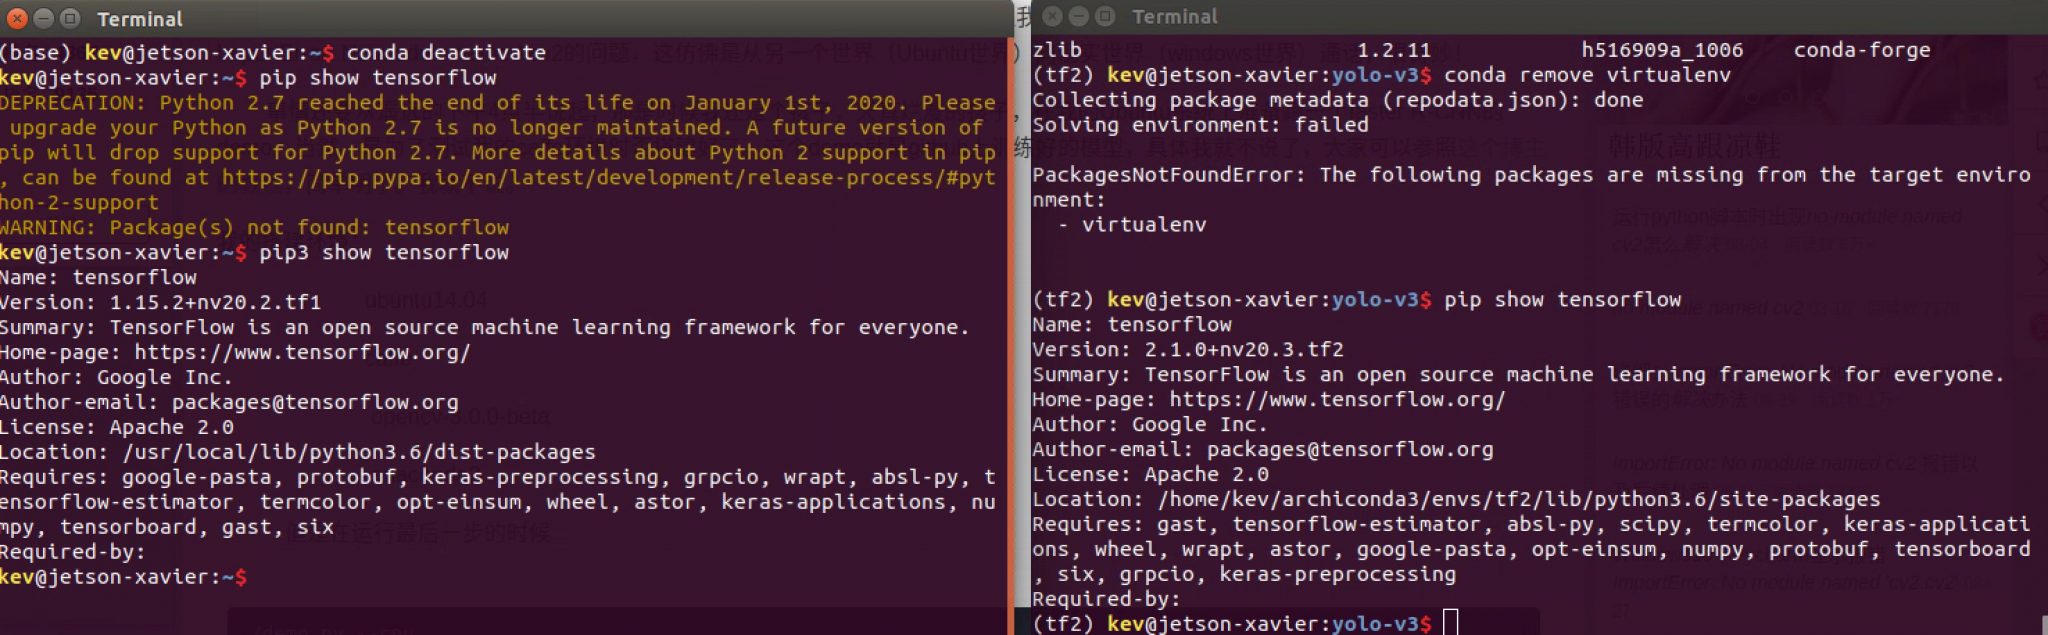
For Edge devices such as the Raspberry Pi and the Jetson Nano, it is very crucial to set up different environments for different projects. For instance, you intend to build a project that requires the TensorFlow==2.1 and its dependencies in the environment, whereas you have already installed the TensorFlow==1.5. You have to make a decision either to uninstall the older version of Tensorflow to install the newer version one, or to keep the older one and work on another project. Archiconda 3 can tackle this problem well. You may create multiple conda environments to install different versions of TensorFlow ! Check out the demo below, and you will know what exactly I am talking about xD
Setup
I created a script for a quick installation. You may also follow the instructions on my repo to install.
1# Download the installation script and run it
2$ cd ${HOME}
3$ git clone https://github.com/miooochi/archiconda3
4$ sudo chmod +x install.sh
5$ ./install.sh
6
7# Check the version, if conda is successfully installed, you will see the version info on the terminal.
8$ conda -V
How To Use
Create/Delete an environment
 1# --To create an environment--
 2$ conda create --name envname (replace envname in your preference)
 3
 4# --To create an environment with a specific version of Python--
 5$ conda create -n envname python=3.6 (replace envname in your preference)
 6
 7# --To delete an environment--
 8$ conda remove -n envname --all (replace envname in your preference)
 9
10# --To remove an environment--
11$ conda remove -n envname --all (replace envname in your preference)
Grant the current user permission
1$ sudo chown -R username ~/archiconda3
Activate/Deactivate the environment
1# --To activate the environment--
2$ conda activate envname (replace envname in your preference)
3
4# --To deactivate the environment--
5$ conda deactivate
6
7# --To prevent conda from activating the base environment by default--
8$ conda config --set auto_activate_base false
Install packages within an environment
 1# --To install a specific package such as SciPy into an existing environment--
 2$ conda install --name envname pkgname
 3
 4# --To add more conda channels
 5$ conda config add --channels channel-name
 6# ie. add forge-conda
 7$ conda config add --channels forge-conda
 8
 9# --If you do not specify the environment name,
10# which in this example is done by --name myenv,
11# the package installs into the current environment--
12$ conda install pkgname
13
14# --Upgrade pip--
15$ python -m pip install --upgrade pip
16
17# --Check pip version (Note please make sure you check the path of the pip,
18# or the packages installed with pip/pip3 might not be installed in the conda environment)--
19$ which pip
20$ which pip3
List all the environments in conda
Run jupyter notebook/lab inside the conda virtualenv
 1$ sudo chown -R username <PATH\TO>/archiconda
 2$ conda install -c conda-forge jupyterlab
 3# install the conda kernel inside a virenv
 4$ conda activate envname (replace envname in your preference)
 5$ conda install -c anaconda ipykernel
 6$ pip3 install --upgrade --force jupyter-console
 7
 8# Add an env to jupyter
 9$ ipykernel install --user --name=envname (replace envname in your preference)
10
11# Remove an env from jupyter
12$ jupyter kernelspec uninstall envname (replace envname in your preference)
13
14# List the existing environments
15$ jupyter kernelspec list
Reference: https://medium.com/@nrk25693/how-to-add-your-conda-environment-to-your-jupyter-notebook-in-just-4-steps-abeab8b8d084
Run jupyter lab remotely from your client machine
 1# For instance, you may open jupyter notebook/lab from a windows/mac machine a client.
 2
 3# -- In the server machine, type the following commands:
 4$ jupyter lab --generate-config
 5$ sudo find / -name jupyter_notebook_config.py #it will display the path of the config file
 6$ vi <PATH\TO\CONFIG>/jupyter_notebook_config.py
 7# you may change the settings in your own preference.
 8
 9
10# -- In your local client machine type the following commands:
11$ rm ~/.ssh/known_hosts
12$ ssh -L 8000:localhost:PORT username_@server_ip  #check the port by opening jupter lab, the default is 8888
13$ jupyter lab
14# note: you may change 8000 to whatever # in your preference
15# (ig: ssh -L 8000:localhost:9999 kev@10.10.10.65 )
16# Type the adrress with the customized in the web browser localhost:8000
17
18# first-time login
19# Copy the token from the server terminal
20# Open a web browser from the client, type localhost:PORT (localhost:8000 as default)
21# then it will prompt up a window to ask you to type in the token, just paste the token, and you should be good to go.
Conclusion
- It is free and open-source.
- It has more than 1500 Python/R data science packages.
- Anaconda simplifies package management and deployment.
- It has tools to easily collect data from sources using machine learning and AI.
- It creates an environment that is easily manageable for deploying any project.
- Anaconda is the industry standard for developing, testing and training on a single machine.
- It has good community support you can ask your questions there.
Check out the video tutorial here , it is realy helpful !


 Kevin Yu