This article is the last post in the Command Tutorial Series. In Series #1 (Basic) , we have walked through some useful commands for topics including File System Basics, File System Permission & Ownership, SSH (Remote Control), and Monitor System Loads (CPU, GPU, Memory). In Series #2 (Intermediate) , we have walked through some useful commands for topics including Symbolic Links, Screen, Python pip installation and management, and Git Commands.
In this article, we will talk through more topics such as Shell Script, ONNX-TensorRT Conversion, Anaconda 3, and CUDA Setup.
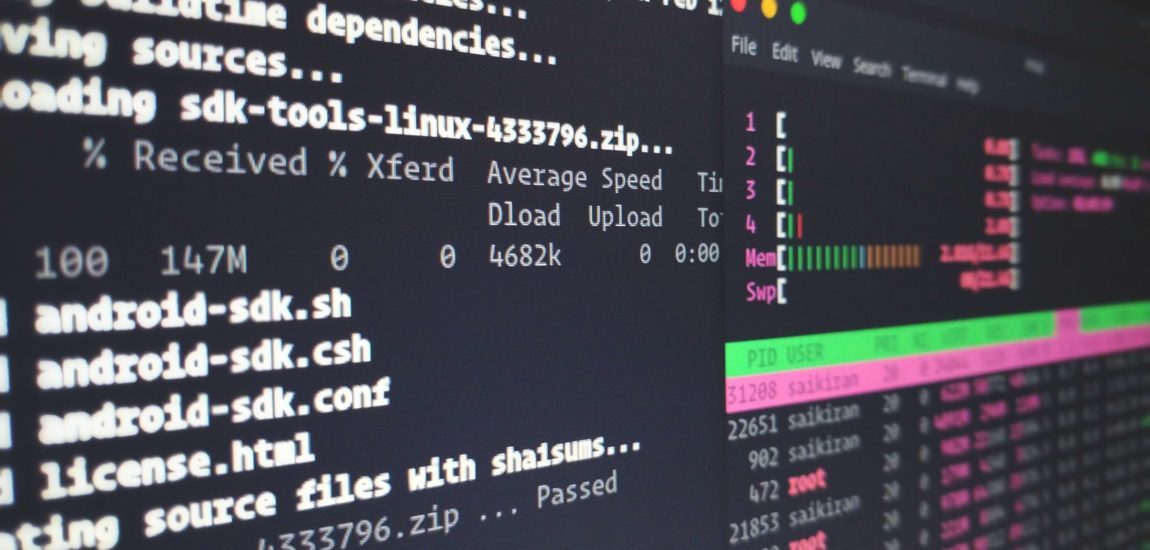
Shell Script
The first thing to do after you create an empty Bash Script is to append the following line to the first line of your script
If it is a Python-based script, you may insert the following line to the first line of your script
Variable
 1# To assign a value to a variable
 2variable=123  (no space is allowed aside "=")
 3
 4# To parse a variable or to use it
 5${variable}
 6#eg #1:
 7new_value = ${variable}
 8#eg #2:
 9temp=$(vcgencmd measure_temp | egrep -o '[0-9]*\.[0-9]*')
10echo "Current temperature : $temp C"
11
12# To pass an argument from console to a variable inside the script
13$1, $2, $3....$n refers to the input arguments from the console
14#eg:
15./test.sh A B C, $1 refers to A; $2 refers to B
Condition
 1#if statement
 2if condition
 3then
 4    command1
 5    command2
 6    ...
 7    commandN
 8fi
 9
10#if else
11if condition
12then
13    command1
14    command2
15    ...
16    commandN
17else
18    comand
19fi
Equality
 1#  sign            reference
 2#  -eq               equal
 3#  -ne             not equal
 4#  -gt        n1 greater than n2
 5#  -lt          n1 less than n2
 6#  -ge    n1 greater than or equal to n2
 7#  -le      n1 less than or equal n2
 8
 9# eg #1:
10
11# if the parameter is not equal to 1, then execute the echo mand
12if [ "$#" -ne 1 ]; then
13    echo "Usage: $0 <Install Folder>"
14    exit
15
16# Note: make sure you have "space" placed aside the sign as the example shown.
17# If you do if [ "$#"-ne1 ] or [ "$#"!=1 ] or ["$#" -ne 1], it is not going to work.
18# ** Space does matter.
19
20# eg #2:
21
22# else if
23if [ $1 -ge 18 ]
24then
25echo You may go to the party.
26elif [ $2 == 'yes' ]
27then
28echo You may go to the party but be back before midnight.
29else
30echo You may not go to the party.
31fi
32
33# eg #3:
34
35# multiple conditions AND example
36if [ -r $1 ] && [ -s $1 ]
37then
38echo This file is useful.
39fi
40
41# eg #4:
42# multiple conditions OR example
43if [ $USER == 'bob' ] || [ $USER == 'andy' ]
44then
45ls -alh
46else
47ls
48fi
I recommend check out more examples here .
Save and Export Absolute Path
 1# Saves the absolute path of the current working directory to the variable cwd
 2$ cwd=$(pwd)
 3$ echo ${PWD}
 4
 5# Export current PATH
 6$ export PATH=$(pwd)+somethingelse
 7
 8# Export a specific PATH
 9$ export PATH=${HOME}/PATH
10$ cd $PATH
 1# Ask the user for login details
 2read -p 'Username: ' uservar
 3read -sp 'Password: ' passvar
 4echo
 5echo Thank you $uservar we now have your login details
 6
 7* -p which allows you to specify a prompt
 8* -s which makes the input silent.
 9
10# Method #1 with read -p
11read -p -> Put the package # you wish to install here: num
12
13# Method #2 with echo -n
14echo -n " -> Put the package # you wish to install here: $num"
15read num
16
17
18#Terminal (output of Method #1)
19
20user@bash: ./login.sh
21Username: ryan
22Password:
23Thankyou ryan we now have your login details
24user@bash:
Function
 1function_example.sh
 2
 3#!/bin/bash
 4
 5# Define a basic function
 6print_something () {
 7echo Hello I am a function
 8}
 9
10# Execute the function
11print_something
12
13# Terminal Output
14user@bash: ./function_example.sh
15Hello I am a function
16Hello I am a function
17user@bash:
Execution
 1# Execute a script with "source"
 2# The shortcut of "source" is ". ", there is a space in between
 3# eg:
 4. tesh.sh
 5# OR
 6source tesh.sh
 7
 8# However, if you want to write commands into ~/.bashrc, you need to use source ~/.bashrc
 9
10# Execute a script with "./"
11# You need to give executable permission to your file
12$ sudo chmod +x test.sh
13$ ./test.sh
14
15# Run a script as a command without "./" and ".sh"
16$ sudo cp test.sh /usr/bin/test
17$ test
ONNX-TensorRT Conversion for YOLOv3
ONNX is an open format built to represent machine learning models. ONNX defines a common set of operators – the building blocks of machine learning and deep learning models – and a common file format to enable AI developers to use models with a variety of frameworks, tools, runtimes, and compilers. LEARN MORE .
NVIDIA TensorRT™ is an SDK for high-performance deep learning inference. It includes a deep learning inference optimizer and runtime that delivers low latency and high-throughput for deep learning inference applications. LEARN MORE .
Repo
I found a very useful repo for those who want to convert your ONNX model to the TensorRT Engine and run real-time inference applications with TensorRT. Check out the repo here .
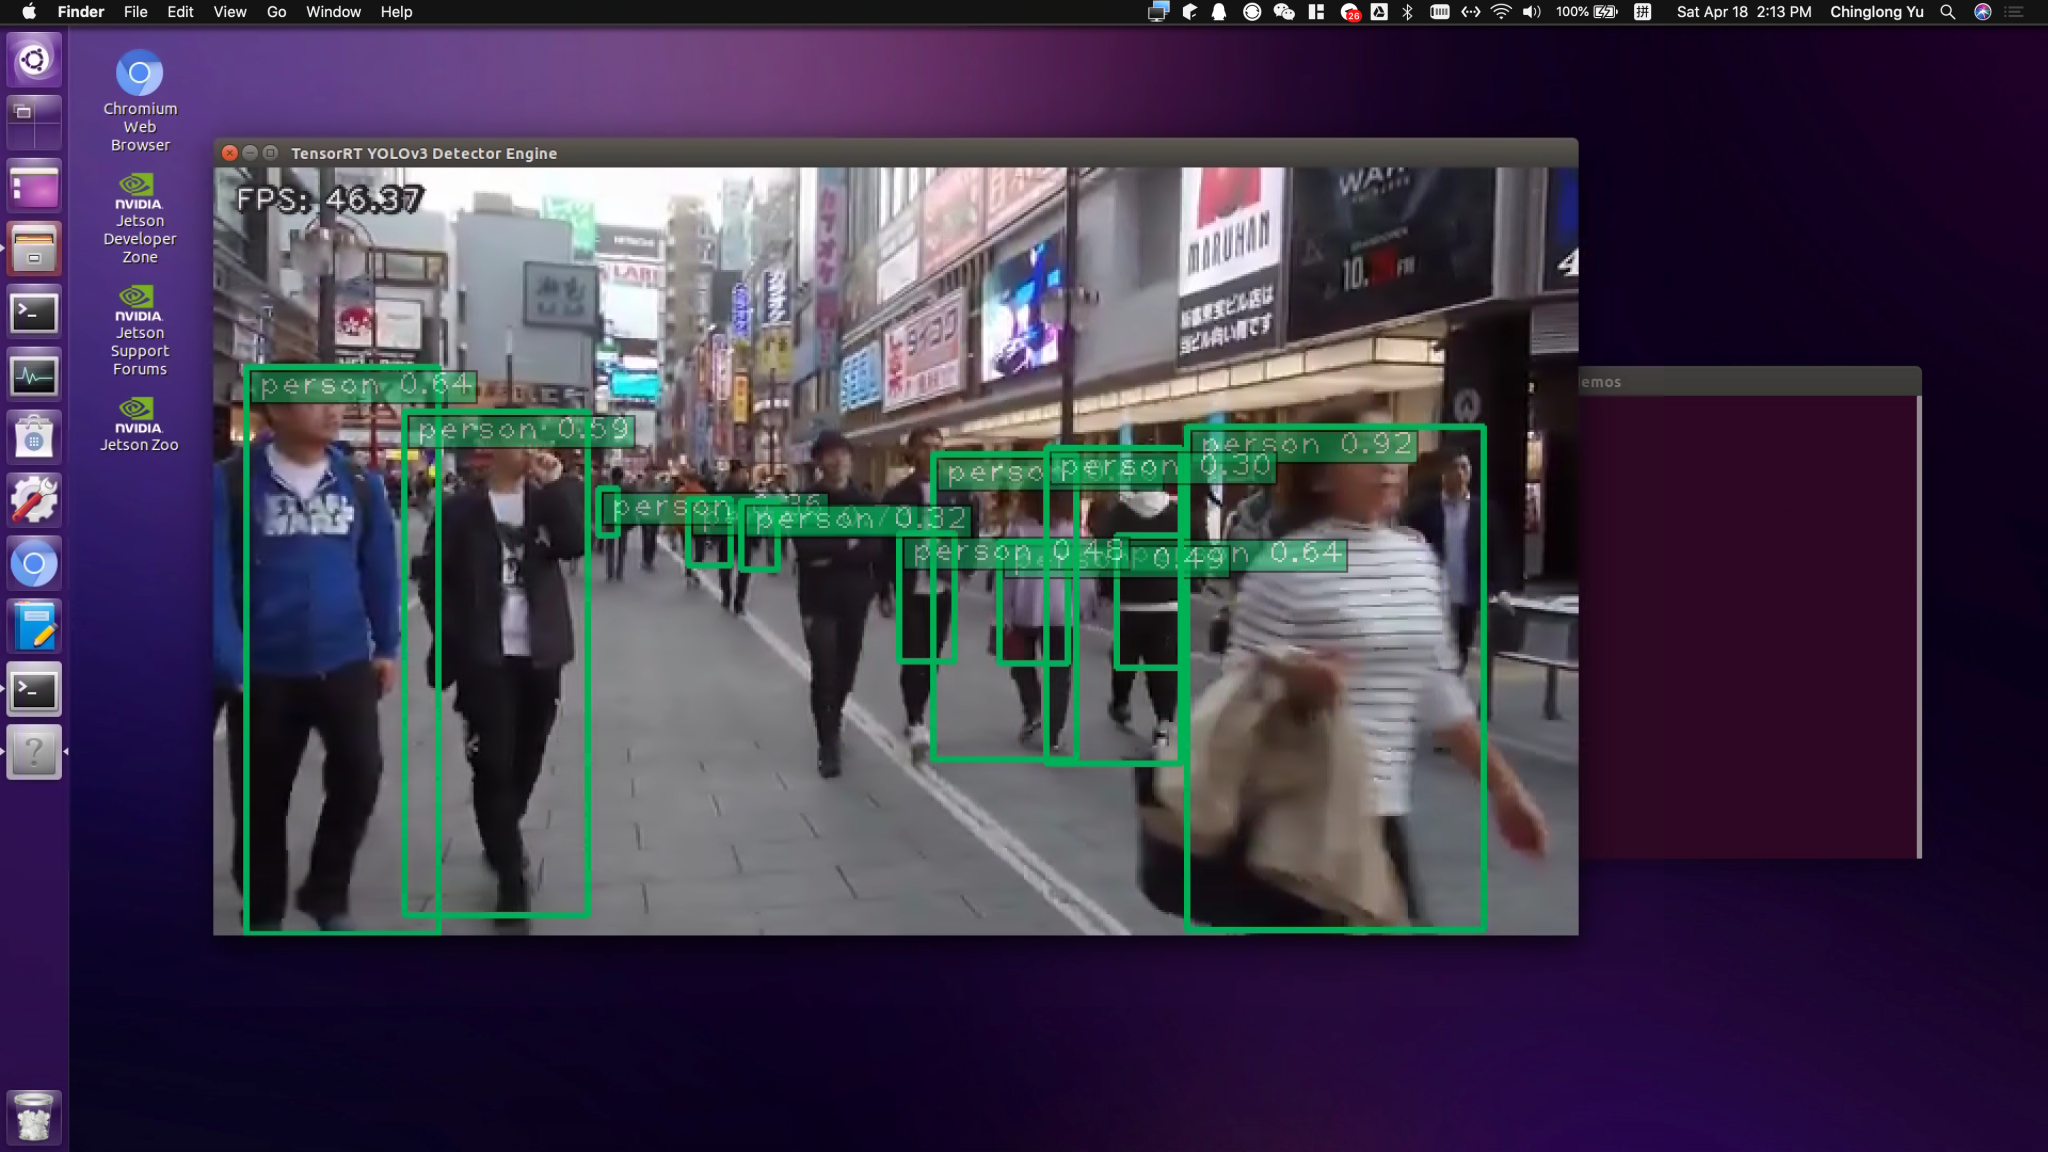
Demo
Note
This repo should work for both ARM64 and X86 computers as long as your environment setup meets all the requirements in the repo.
I strongly recommend setting up a virtual environment or conda environment for this project because you might encounter packages conflict issues.
Setup
 1# Check Tensorrt if already installed
 2$ dpkg -l | grep TensorRT
 3
 4# Install ONNX
 5$sudo apt install protobuf-compiler libprotoc-dev
 6$pip install onnx==1.4.1
 7
 8# Check tensorRT for Python3
 9$ pip list
10# If it has not been installed yet,
11# for x86 computer users, you will need to check out the Nvidia website for the installation guide.
12# For Jetson users, you will need to copy the local packages to the environment libraries.
13cd /usr/lib/python3.6/dist-packages/
14
15# Copy the packages below
16/usr/lib/python3.6/dist-packages/tensorrt
17/usr/lib/python3.6/dist-packages/tensort-5.0.6.3.dist-info
18/usr/lib/python3.6/dist-packages/graphsurgeon
19/usr/lib/python3.6/dist-packages/graphsurgeon-0.3.2.dist-info
20/usr/lib/python3.6/dist-packages/uff
21/usr/lib/python3.6/dist-packages/uff-0.5.5.dist-info
22
23# to ~/.virtualenvs/envname/lib/python3.6/site-packages
24# or to ~/archiconda3/envname/lib/python3.6/site-packages
25# or to ~/.conda/envname/lib/python3.6/site-packages
26# envname is the name of your environment
27
28# Download the source code
29$ git clone https://github.com/jkjung-avt/tensorrt_demos
30
31# Install pycuda
32$ pip install pycuda
33
34# Download yolov3 weight
35$ cd ${HOME}/project/tensorrt_demos/yolov3_onnx
36$ ./download_yolov3.sh
37
38# Convert yolov3-416 model to onnx,
39$ python3 yolov3_to_onnx.py --model yolov3-416
40
41# Convert yolov3-416.onnx to yolov3-416.trt
42$ python3 onnx_to_tensorrt.py --model yolov3-416
Test
 1# Download the testing image
 2$ wget https://raw.githubusercontent.com/pjreddie/darknet/master/data/dog.jpg -O ${HOME}/Pictures/dog.jpg
 3# Run the test
 4$ python3 trt_yolov3.py --model yolov3-416 --image --filename ${HOME}/Pictures/dog.jpg
 5
 6# Or to open a USB Camera live show
 7$ python3 trt_yolov3.py --model yolov3-416 --usb --vid 0 --height 720 --width 1280
 8
 9# Notes: for  opening a USB webcam, you need to modify a camera config file,
10# located in ~\tensorrt_demos\utils\camera.py
11# Set USB_GSTREAMER to false
12USB_GSTREAMER = False       # True to False
13
14# Or to use a media file as input
15# Add the following attribute to run the trt_yolov3.py
16--file --filename shinjuku.mp4
17# It should look like
18$ python3 trt_yolov3.py \
19    --model yolov3-tiny-416 \
20    --height 720 --width 1280 \
21    --file --filename shinjuku.mp4
Archiconda 3
Archiconda3 is a distribution of conda for 64 bit ARM. Anaconda is a free and open-source distribution of the Python and R programming languages for scientific computing (data science, machine learning applications, large-scale data processing, predictive analytics, etc.), that aims to simplify package management and deployment. Like Virtualenv, Anaconda also uses the concept of creating environments so as to isolate different libraries and versions.
For more information about the setup and usage of Archiconda 3, please visit the site here .
CUDA Setup
CUDA stands for Compute Unified Device Architecture, and is an extension of the C programming language and was created by Nvidia. Using CUDA allows the programmer to take advantage of the massive parallel computing power of an Nvidia graphics card in order to do general-purpose computation.
For Jetson Devices, you do not need to install CUDA and cuDNN because they are pre-installed in the JetPack. The setup below is mainly for computers running x86-based operation system and equipped with one or more Nvidia Graphic Cards.
Notes: If you want to set up CUDA on your cloud server, using the following setup should work.
CUDA 10.0
 1# Installation Instructions:
 2$ wget https://objectstorage.ca-toronto-1.oraclecloud.com/n/yzpqsgba6ssd/b/bucket-20200415-0121/o/cuda-repo-ubuntu1804_10.0.130-1_amd64.deb
 3$ sudo dpkg -i cuda-repo-ubuntu1804_10.0.130-1_amd64.deb
 4$ sudo apt-key adv --fetch-keys https://developer.download.nvidia.com/compute/cuda/repos/ubuntu1804/x86_64/7fa2af80.pub
 5$ sudo apt-get update
 6$ sudo apt-get install cuda
 7
 8$ echo 'export CUDA_HOME=/usr/local/cuda' >> ~/.bashrc
 9$ echo 'export PATH=$PATH:$CUDA_HOME/bin' >> ~/.bashrc
10$ echo 'export LD_LIBRARY_PATH=$LD_LIBRARY_PATH:$CUDA_HOME/lib64' >> ~/.bashrc
11
12$ source ~/.bashrc
13
14# Test if everything is working fine.
15
16$ nvcc --version
17$ nvidia-smi
cuDNN 10.0
 1$ wget https://objectstorage.ca-toronto-1.oraclecloud.com/n/yzpqsgba6ssd/b/bucket-20200415-0121/o/cudnn-10.0-linux-x64-v7.5.0.56.tgz
 2$ sudo tar -xzvf cudnn-10.0-linux-x64-v7.5.0.56.tgz -C /usr/local/
 3$ sudo chmod a+r /usr/local/cuda/include/cudnn.h
 4
 5# install python-nvcc plugin
 6$ sudo apt install python3-pip
 7$ sudo -H pip3 install --upgrade pip
 8$ sudo apt-get install unzip
 9$ sudo pip install git+git://github.com/andreinechaev/nvcc4jupyter.git
10
11# check if installed successfully
12$ sudo /usr/local/cuda/bin/nvcc --version
That’s all the contents for the Useful Linux Commands for AI Development Series. I hope you find something useful for your project development. Good Luck !


 Kevin Yu